Deck the Halls with Wine Bottle Crafts
Goodbye, Thanksgiving. Hello, Christmas!
It’s that time of year again. Christmas connoisseur’s everywhere break out the tinsel, the neighborhoods are illuminated with lights, “Santa Baby” plays on repeat, and your bank account braces for impact. With the gifts and travel and holiday treats you already have to budget for, do you really have to purchase new decorations? The answer: you don’t.
This year, don’t let decor break the bank. What if we were to tell you that you could make your home a winter wonderland by being a little crafty and drinking a little (or a lot!) of wine? Here are three Pinterest-perfect ways to repurpose wine bottles from your Wine Country Gift Basket’s assortment to decorate this holiday.
For all crafts, start by soaking your wine bottles in warm water with 5-10 tablespoons of baking soda for 30 minutes to ensure the label can be easily removed. Scrub remaining label off with a dish rag. While they’re soaking, prep your area by laying down newspapers.
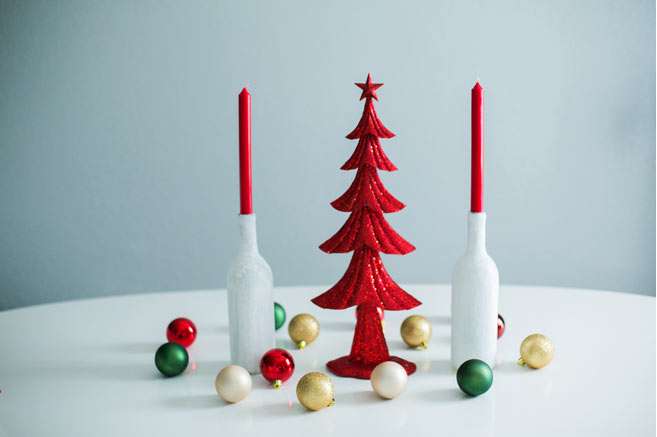
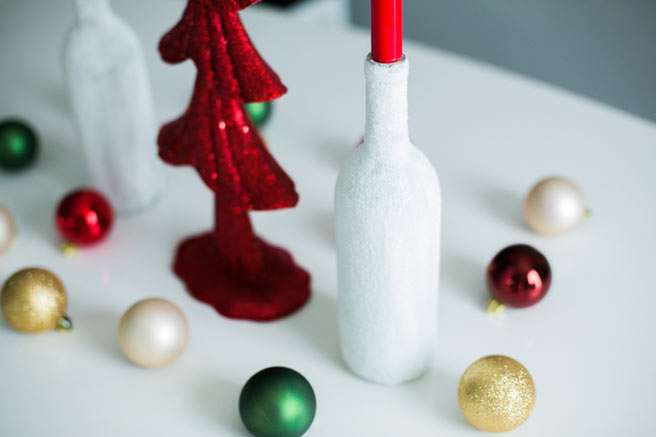
#1. Snowy Candlelit Bottles
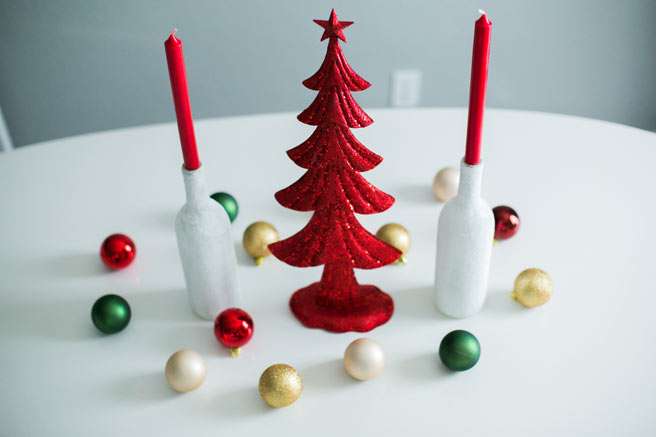
Light up your home with these homemade holiday candlestick holders. They can stand alone or complement a festive arrangement you’ve already started. No need to go out and spend your whole paycheck on setting a merry mood. Bonus, the more wine you drink – the more candlestick holders you can make!
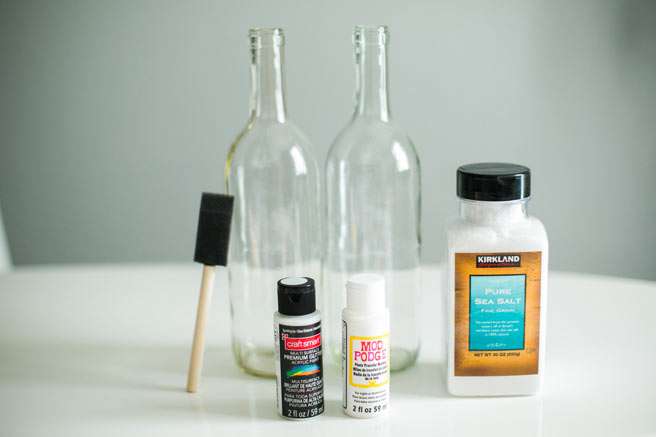
Supplies:
-
2 clean, empty wine bottles (Recommended: clear, colorless bottles)
-
30 oz. Pure sea salt
-
2 oz. Mod Podge Waterbase Sealer
-
2 oz. Multi-Surface Premium Ultra Bright Metallic Paint (Bright Silver)1" Wooden Handle Poly Foam Brush
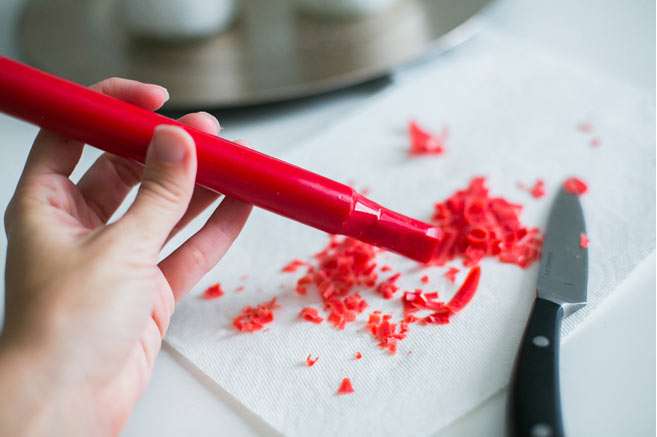
2 red or green taper candles
Kitchen knife
Directions:
-
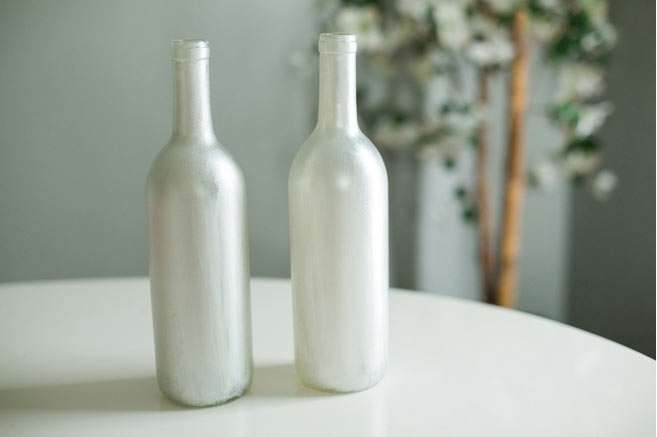
Use the foam brush to entirely paint the two clean, dried wine bottles with the Multi-Surface Premium Ultra Bright Metallic Paint (Bright Silver). Allow to fully dry.
-
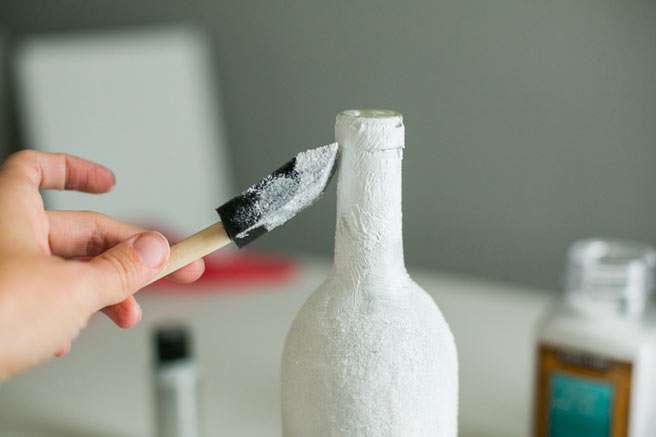
Clean foam brush. Then, use the brush to apply Mod Podge Waterbase Sealer to base of wine bottle (leave bottleneck).
-
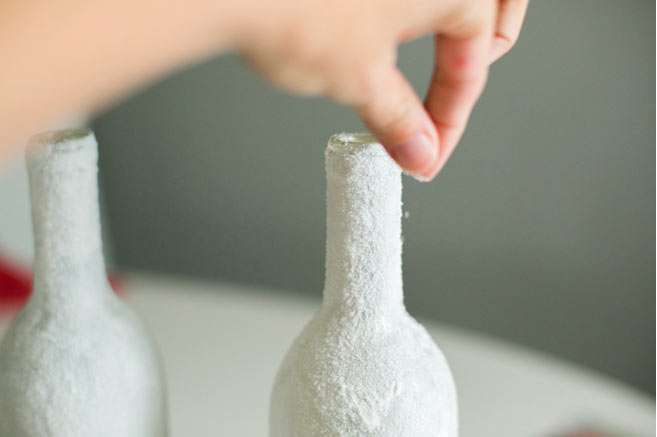
Generously pour sea salt onto newspaper.
-
Roll wine bottle (still wet with Mod Podge) in sea salt until evenly coated.
-
Apply Mod Podge to bottleneck and sprinkle sea salt to match base of bottle.

-
While the now snowy-looking wine bottle dry, use the kitchen knife to trim the base of your taper candles to fit inside the bottleneck of the wine bottle.
-
Once bottle has dried, place trimmed taper candles into the bottles.
-
You’re done!
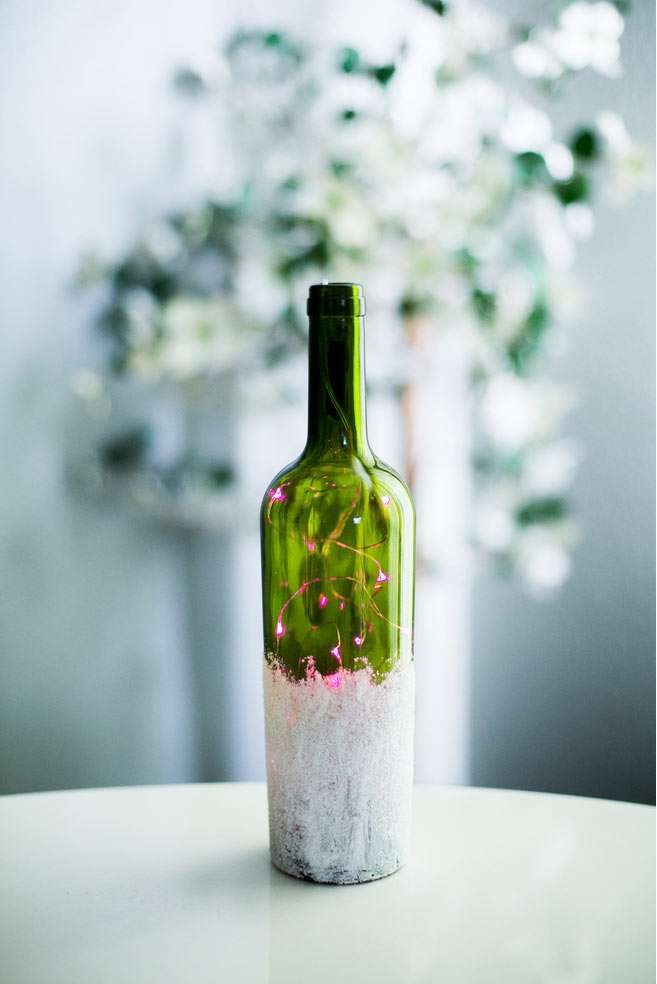
#2. Wintery Twinkle Bottle
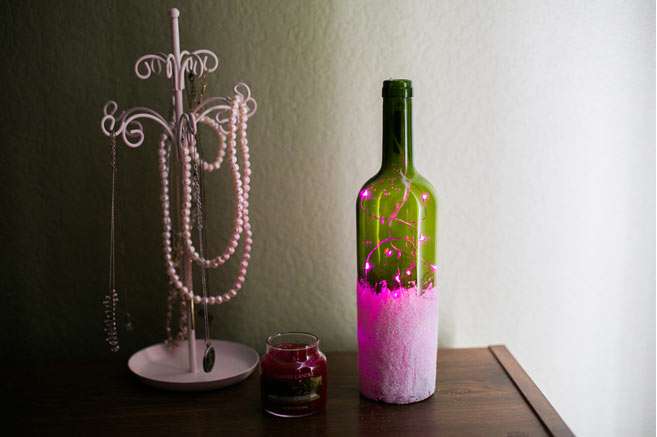
Why have just one Christmas star when you can have dozens showcased in wintery wine bottle throughout your home? With whatever color light you like - white, red, green, or even pink - these light-up bottles will bring warmth and holiday spirit to wherever you set them. Use them as holiday night-light in your children’s rooms or place in your window for neighbors and friends to admire.
Supplies:
-
1 clean, empty wine bottle (Recommended: Green-colored bottle)
-
30 oz. Pure sea salt
-
2 oz. Mod Podge Waterbase Sealer
-
Command Frame Stabilizer Strips
-
Battery-operated mini string light
Directions:
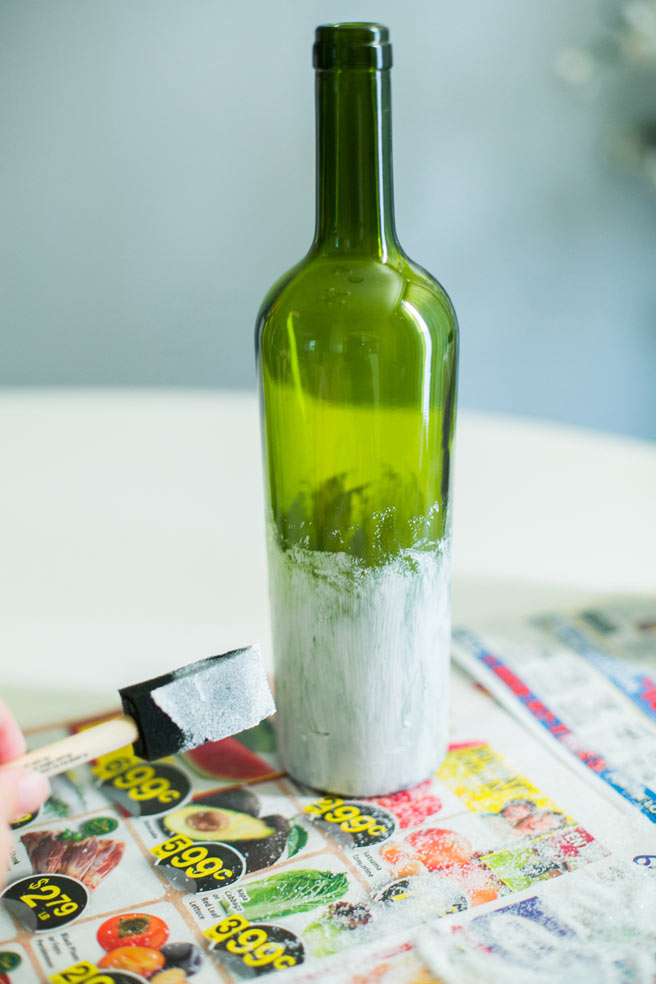
-
Use the clean foam brush to paint half of the base of the dried wine bottle with Mod Podge Waterbase Sealer.
-
Generously pour sea salt onto newspaper.
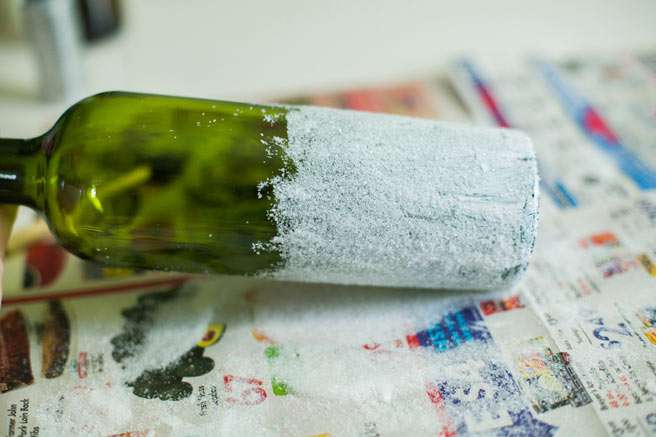
-
Roll wet wine bottle in it to create a snowy-looking base.
-
Set bottle aside. Apply command strips to back of battery on the battery-powered mini string lights so it’s sticky the touch.
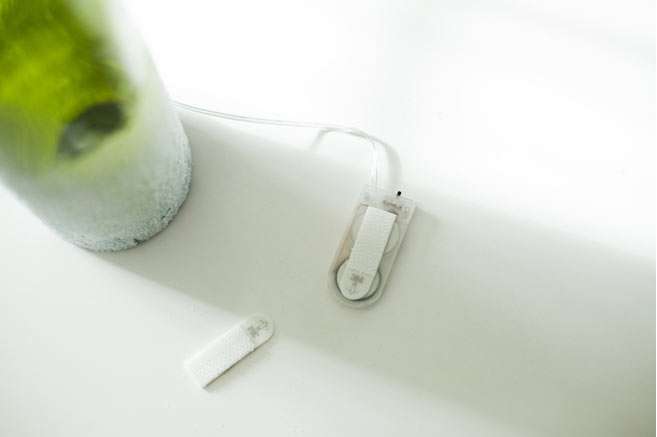
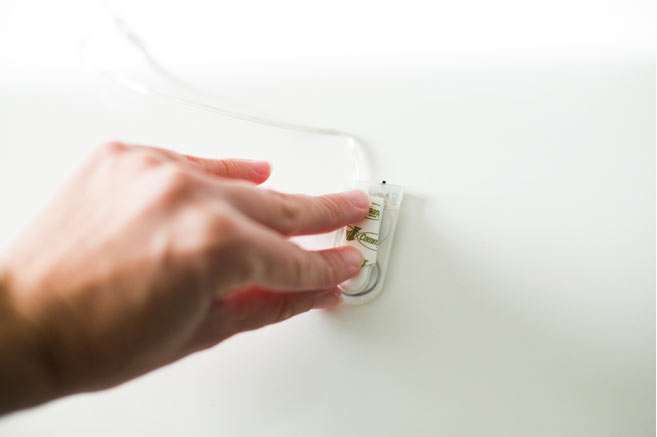
-
Apply sticky battery to the neck of the dried wine bottle.
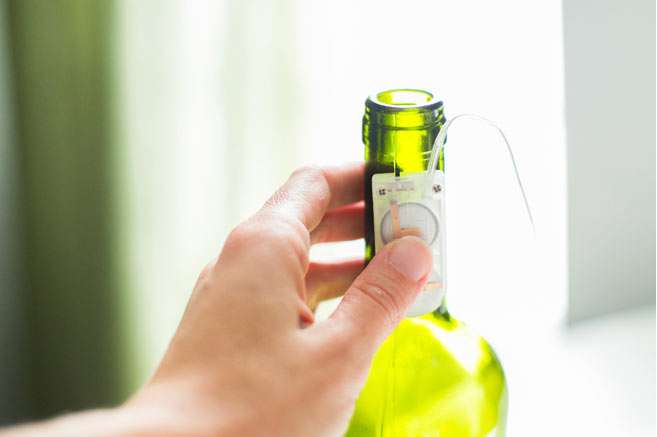
-
Insert mini string lights into bottle, making sure to keep battery sticking on outside neck of bottle.
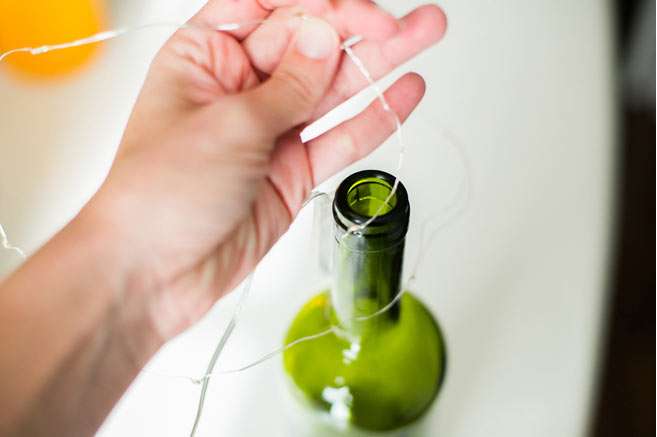
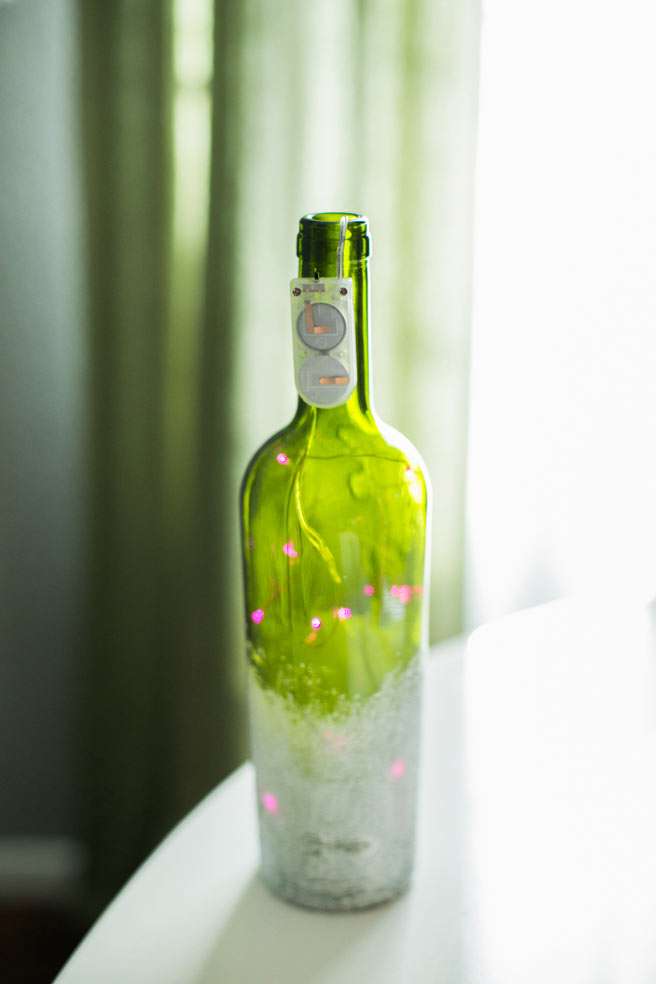
-
Turn bottle so battery can’t be seen and tah-dah! Holiday décor.
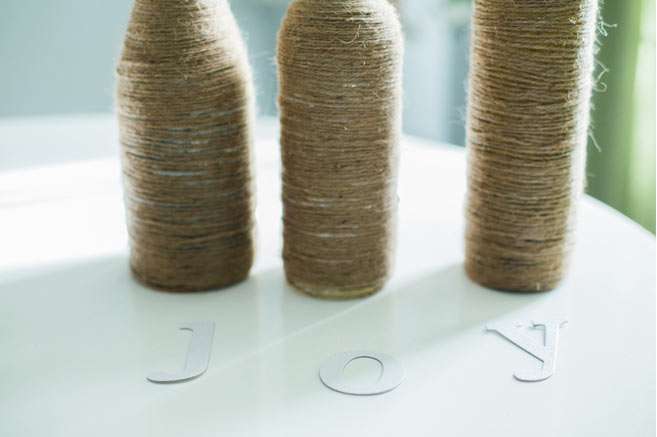
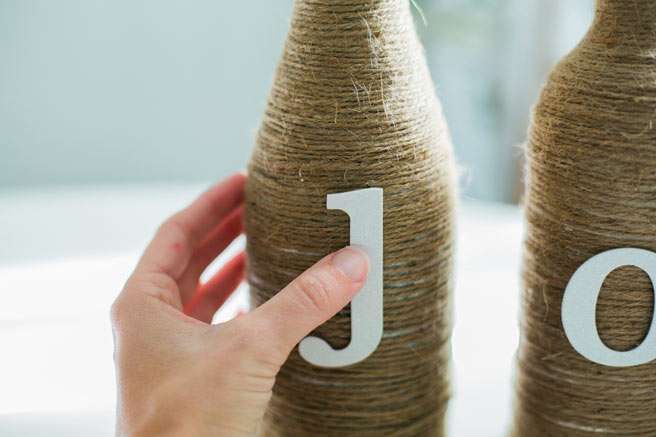
#3. “JOY”ful Holiday Bottles

You’ll feel merry every time you look at this Pier-1-worthy decoration that you crafted entirely on your own. When friends ask you where you got the seasonal centerpiece, feel free to brag just a tad. Although Wine Country Gift Baskets spelled out “JOY,” you can create any word you please. Some other suggestions are “SNOW,” “MERRY” or “JOLLY.” Use different bottle shapes and sizes for variation, or uniform – your pick!
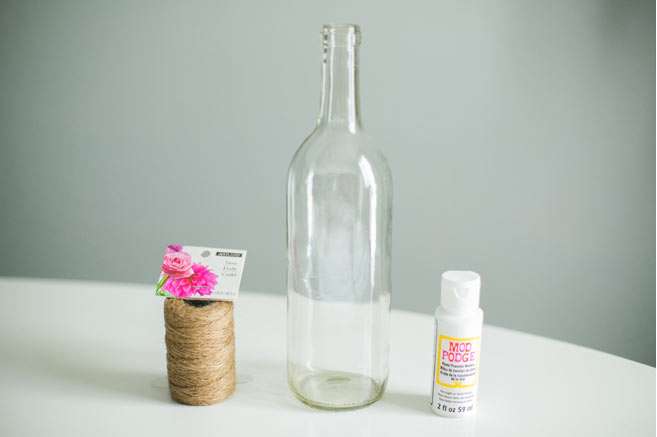
Supplies:
-
3 clean, empty wine bottles
-
2 oz. Mod Podge Waterbase Sealer
-
120 ft. Natural Jute Twine
-
12” Craft red berry picks (or centerpiece of choice)
-
Craft wooden letters “J,” “O,” and “Y”
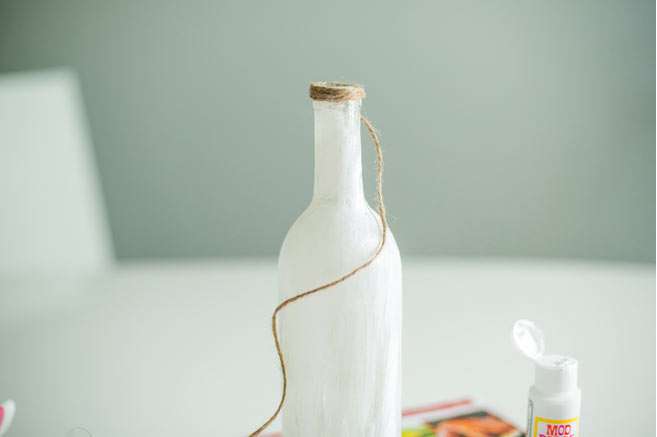
(Note: Do one bottle at a time to ensure bottles are wet with Mod Podge when applying twine.)
-
Use clean foam brush to apply Mod Podge to entire outside of wine bottle.
-
While Mod Podge is still wet, carefully loop twine entirely around bottle making sure it’s evenly covered, leaving as little white showing as possible.

-
Allow twine to dry on wine bottle. Then, apply Mod Podge to the back of each craft letter.
-
Carefully apply each craft letter to one of the finished wine bottles. Hold for a moment to ensure it sticks.
-
You’re done! Joy to your kitchen, living room, or bedroom!

Happy Holidays! For more gift baskets, crafts and DIY’s, and recipes from Wine Country Gift Baskets, follow us!