3 Easy DIY Mother’s Day Crafts to do with the Kids
With Mother's Day just next week, we thought we'd round up a few simple, easy-to-make gifts that even kids can create, to help you in any last-minute pinch you might be in! Of course, it’s not too late to order one of our gorgeous Mother’s Day Baskets, either!
May Flowers Fridge Magnets
These would be adorable if accompanied by some artwork made by the kids or grandkids!
Supplies Needed:
Flower Embellishments (check the scrapbook section of your local craft store)
Hot Glue
Wine Corks, sliced into 1/4" slices
Strong Magnets, various sizes
Twine or Ribbon
Eye Hooks
Washi Tape
Scissors
Directions:
1. Using your Washi Tape, decorate one side of the corks as you like, trimming it as needed. You can hot glue the flower embellishments on top of the Washi Tape or directly on the cork for added fun. Get creative, and decorate them how you like!
2. Hot glue a magnet to the back of the cork.
3. To create a dangling flower, screw an eye hook into the side of a cork and tie a loop through it with twine or ribbon, with the knot facing downwards. Hot glue a flower to the knot. Voila!
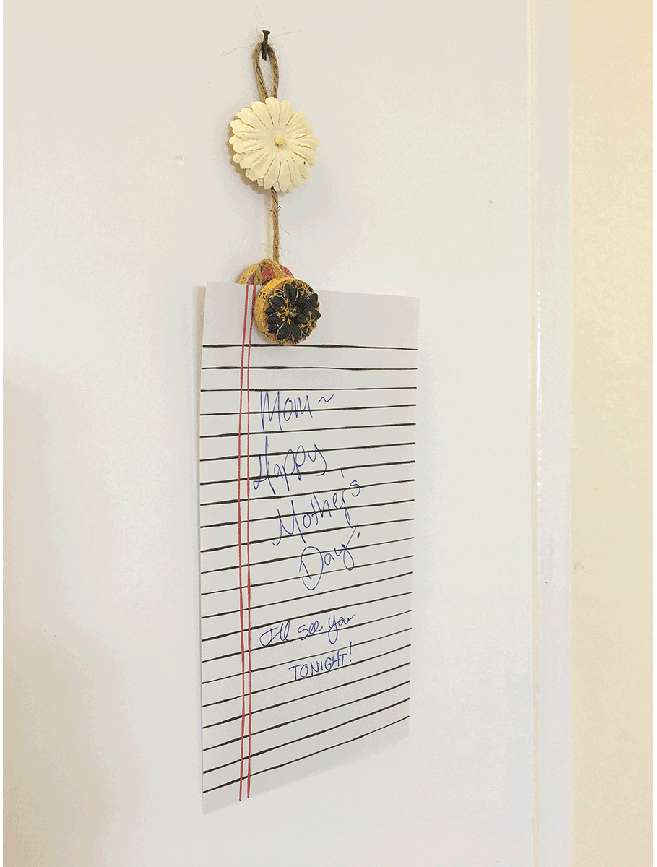
4. If you'd like to create the Note/Towel Holder, connected with twine (pictured below), follow these instructions:
2. Using a sharp knife, carefully cut a straight 'chunk' out of the back of a cork slice, that way the twine nestles in perfectly. Repeat on 2 more cork slices, and hot glue the twine in. For the top cork slice, make sure the twine end doubles back and nestles in to create a loop. You may need to cut a bigger chunk out of the cork to achieve this.
3. Decorate the top cork slice and the bottom cork slice with flowers.
4. For the middle cork slice, decorate it with Washi tape, and cover a tiny magnet with a coordinating Washi tape pattern. Hot glue the small magnet onto the front of the middle cork slice.
5. Hot glue a magnet to the back of the bottom cork slice. If you'd like it to be used on the refrigerator as well, hot glue a third magnet to the back of the top cork slice. Voila! Wrap them up in a pretty box, and you’re set!
Hand-Painted Wooden Spoons
Fun to make and easily personalized, and is a great craft for older kids to do. Plus, who doesn't need more cooking utensils?
Supplies Needed:
Acrylic Paint in various colors
Paintbrushes in various sizes/shapes
Painters Tape
Gold Leafing Pen
Wooden Spoon Set
Polyurethane
Directions:
1. Fill multiple cups or bowls with your chosen paint colors. Taking one spatula at a time, begin painting a design that you like. Painters Tape will help you achieve straight, clean lines, so use it when and where applicable. Also, make sure the paint doesn't go down the handle too far, as anything with paint (or Polyurethane) on it won't be food-safe.
2. Once you’ve finished painting your design, set them, handle-side-up, in a separate (heavy) glass dish or pot to dry. Alternatively, you can set them off the side of the counter.
3. Repeat steps 1 and 2 with various paint colors to add to the complexity of your design. Be creative and have fun!
4. If you'd like, add some metallic flourishes with a gold leafing pen after the paint has completely dried.
5. Brush your handles with Polyurethane, taking care not to spread it any further than is absolutely necessary so you preserve the food-safe properties of the wood at the base. Allow to dry according to the directions on the can, and repeat 4 more times. It seems excessive, but 5 coats makes the spatulas top-rack dishwasher-safe, though handwashing is recommended for wood utensils. But let’s be real - lazy happens!
6. Tie off with a ribbon and wrap them up for your mother – she’ll love them!
Chocolate Cake Walnut Bark
Yes, you read that right. What woman could turn down homemade chocolate goodies? This is a fun and easy recipe to do with the kids!
Ingredients:
1-16oz. Bag of Dark or Milk Chocolate Chips
1 Box of Vanilla Cake Mix
Walnut Pieces
Directions:
1. Line a 9x13 casserole dish with parchment paper, cutting the paper to fit the bottom of the pan.
2. Pour your chocolate chips into a large, microwave-safe glass bowl, and microwave for 30 seconds. Remove, stir well, and place back into the microwave for an additional 10 seconds. Repeat this process until your chocolate is completely melted.
3. Add 4 Tbsp. of the powdered cake mix to the chocolate and stir well.
4. Pour the chocolate mixture into your prepared casserole dish, using a rubber spatula to scrape the bowl. Smooth the chocolate mixture evenly into the pan, making sure the chocolate isn't too thick. Aim for 1/16" or 2/16" thick.
5. Sprinkle the chocolate with the walnut pieces and additional cake mix, and place in the refrigerator for 30 minutes to an hour, or until completely hardened.
6. Place in a plastic baggie or other container, wrap, and gift!