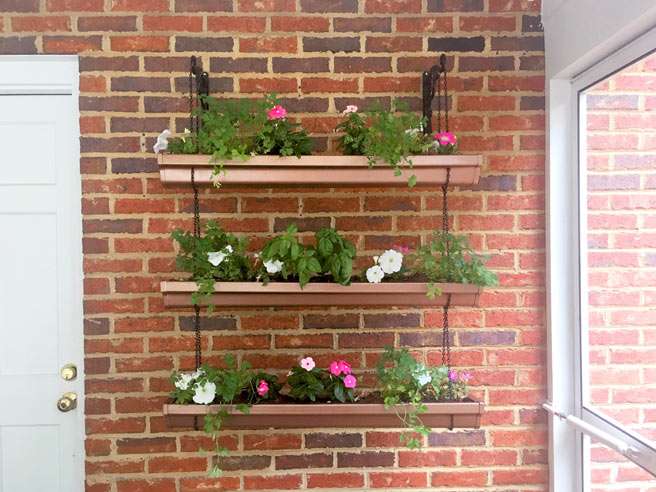
DIY Hanging Gutter Garden
Spring has sprung, and with it comes all the beautiful results of Mother Nature flaunting her love for color. Wildflowers are popping up everywhere, along with vibrant green foliage and barely-noticeable buds filling the grapevines that will eventually grow into the grapes we love so much. This time of year inspires us to get our hands dirty by planting small, green sprigs that we hope will grow into the lush plant our Spring dreams envision. Of course, the need for pots of all sizes, or plots of nutrient-rich soil, gave us pause. We wanted to do something different. Something classy and modern, yet still easy to create no matter what level of DIY-er you are.
And so we did.
DIY Hanging Gutter Garden
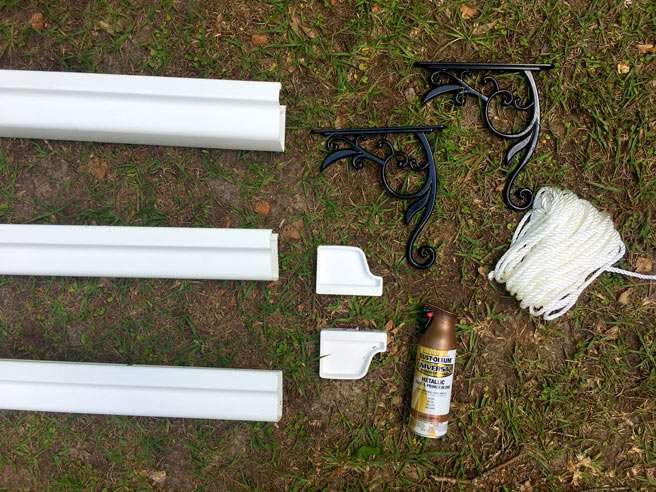
Materials Needed:
10' Vinyl Gutter
3 Sets of Vinyl Gutter Endcaps (6 caps total)
1 Can of Outdoor Spray Paint
16' of Chain or 17' Rope, divided into two equal sections
With chain: Small Zip Ties, same color as your chain
2 Plant Hangers
1 Large Bag of Potting Soil
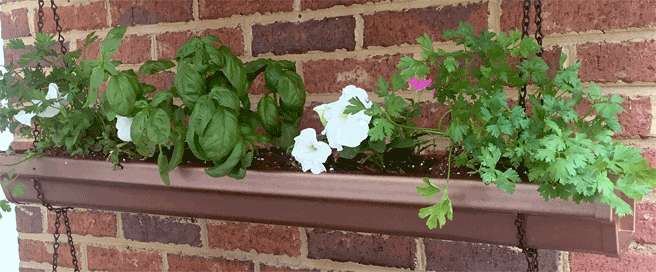
Your Choice of Plants/Flowers/Herbs
Tools Needed:
Jigsaw, Reciprocating Saw, or a Hack Saw
Screw gun with a bit diameter wide enough for your rope/chain
Measuring Tape
Pencil
Directions:
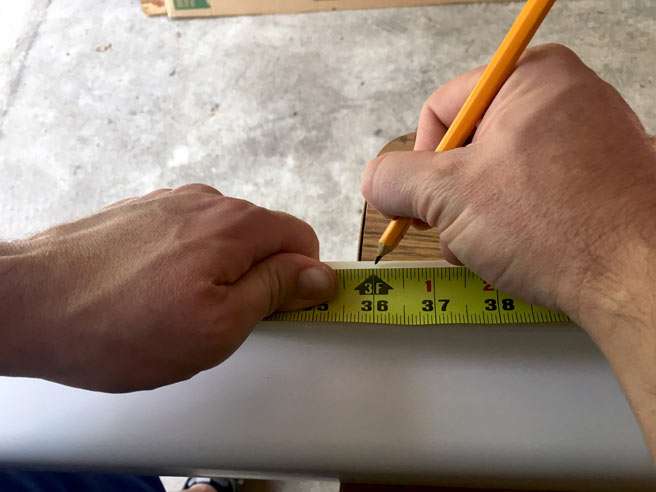
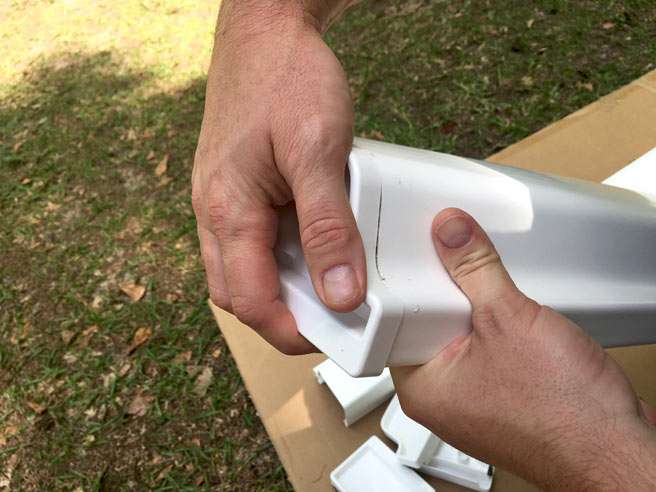
1. Measure and cut your gutter into 3' sections, or into widths of your choosing. Then, fit the end caps snuggly into the ends of each gutter section. This will take a little manipulation of the plastic but should be a tight fit once placed correctly.

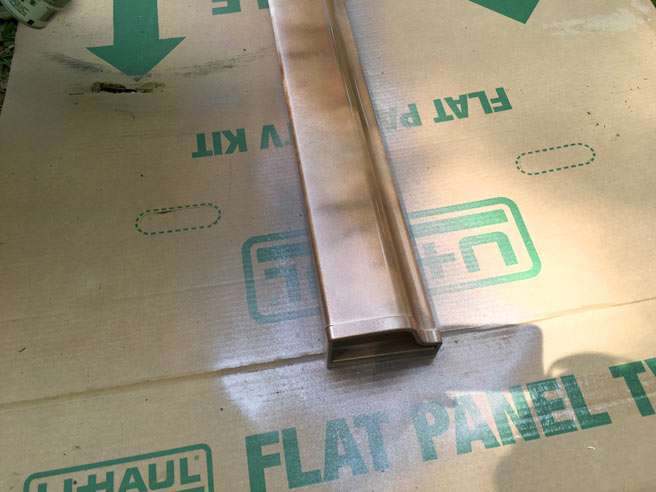
2. Spray paint your gutters in the color of your choosing. We chose Rustoleum Aged Copper, and because it is a metallic color, required 3-4 coats. Whatever color you choose, make sure you apply enough paint with plenty of drying time in between to achieve a rich, full color. Pay special attention to the end caps!
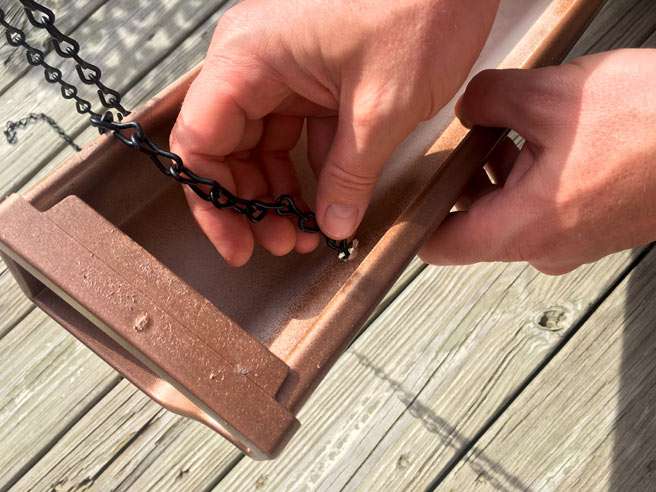
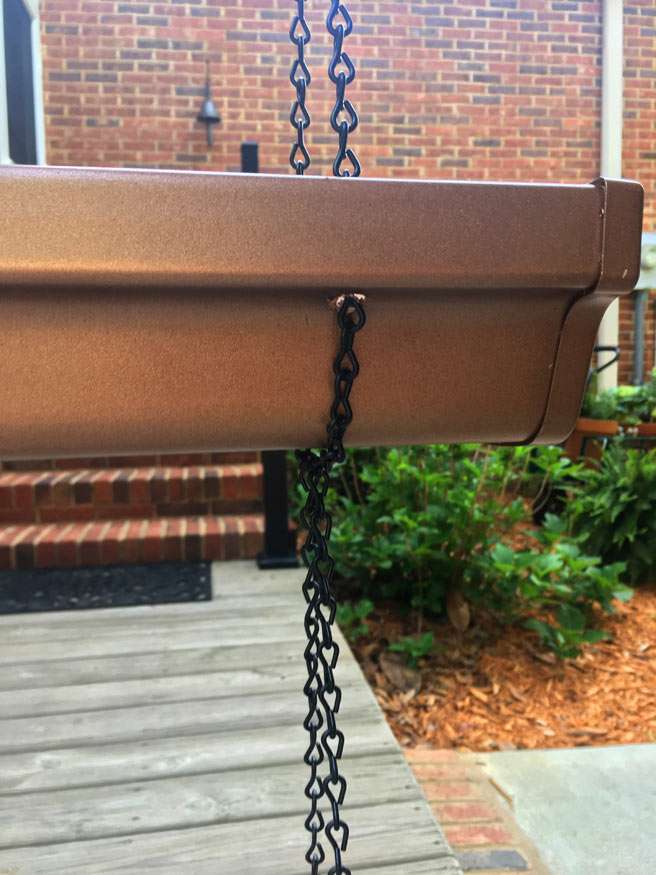
3. Drill holes into the ends of your gutters where you want to loop your chain or rope through later. To offer the gutters the best support since we chose to create long, 3' sections, we drilled holes 3 1/2" in from each end, as pictured:
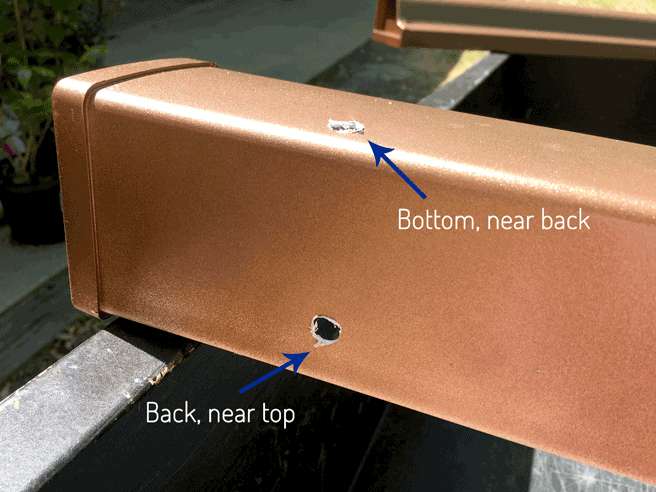
One hole in the bottom near the back of the gutter, one hole on the back of the gutter near the top, and one hole on the front of the gutter in the "scoop" of the decorative face.
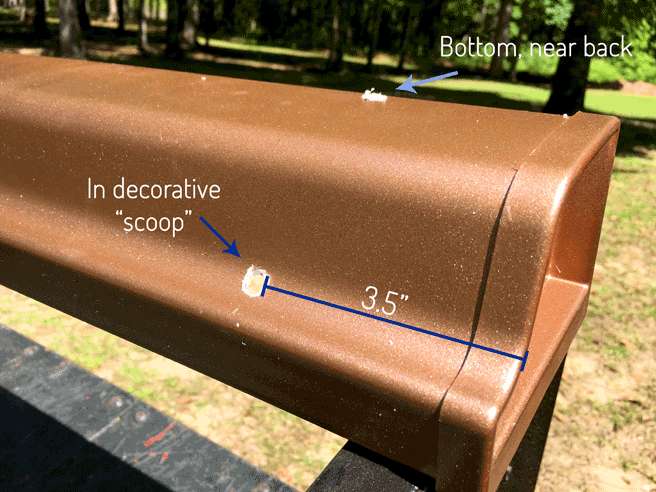
We wanted the holes to be obvious to see in pictures, so we painted our gutters first, then drilled our holes, spraying an additional layer of paint to conceal the white parts later. We recommend drilling your holes before you paint, though!
4. Once your gutters are 100%, completely dry, it's time to start assembling your garden, beginning with threading the rope or chain through your pre-cut holes. (It may help to have a friend assist you with the following steps.) Hanging your rope or chains over a horizontal broomstick, making sure they're equal in length and don't touch the ground, begin threading the rope or chain through your topmost gutter garden as you see fit. We wanted our black chain to stand out against the copper, so we threaded as you see here:
One chain is pulled through the inside to the outside where the face/front of the gutter is…
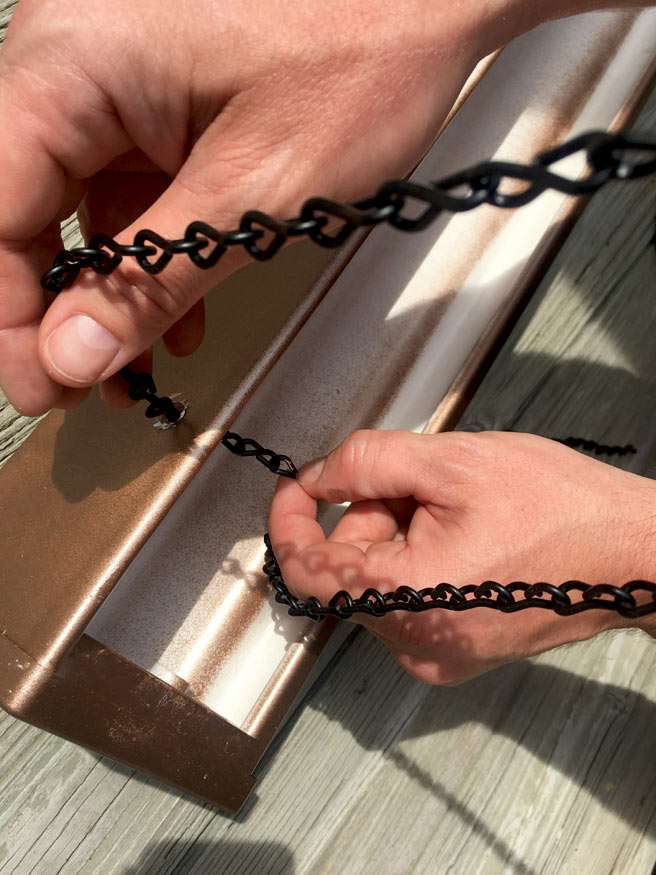
The second chain is pulled from the backside, into the inside…
…and down through the bottom of the garden.
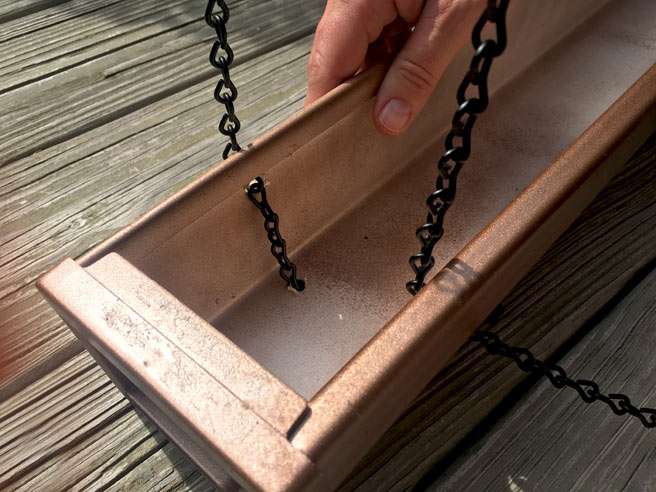
5. Slide your top gutter up until it's about 11" from the broomstick, making sure that the gutter sits parallel and even all the way across. Using a zip tie (or a simple knot), bring the chain or rope together tightly underneath both ends of the gutter.
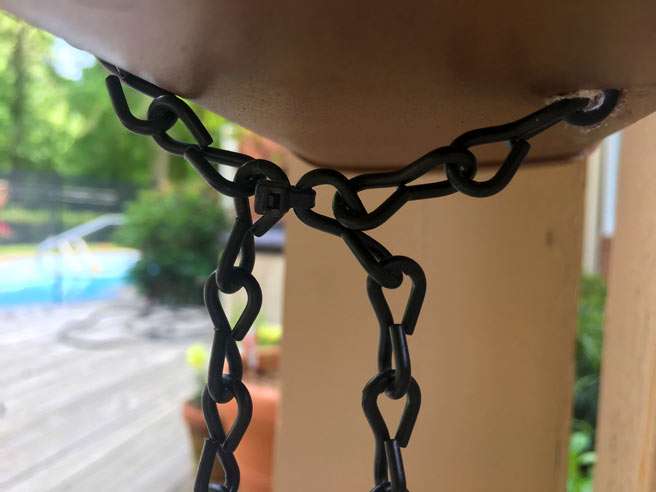
Repeat this process with the remaining two gutters, consistently checking that they are evenly spaced and level. If you chose to use chains, cut the tail of the chain off under the bottom gutter. If you chose to use rope, you may like the look of the extra 'flowing long', or you may choose to cut it shorter. Either way, be sure you leave enough length that your knot doesn't untie itself.
6. Step back and admire your work! Then, mount your plant hangers or brackets at the same width as your chain and rope and at an appropriate height for the location. It may be easier to hang it, then plant it; or, if you have the strength or help, you can plant it then hang it up. Give your new plants a healthy drink of water and enjoy your fun new gutter garden!