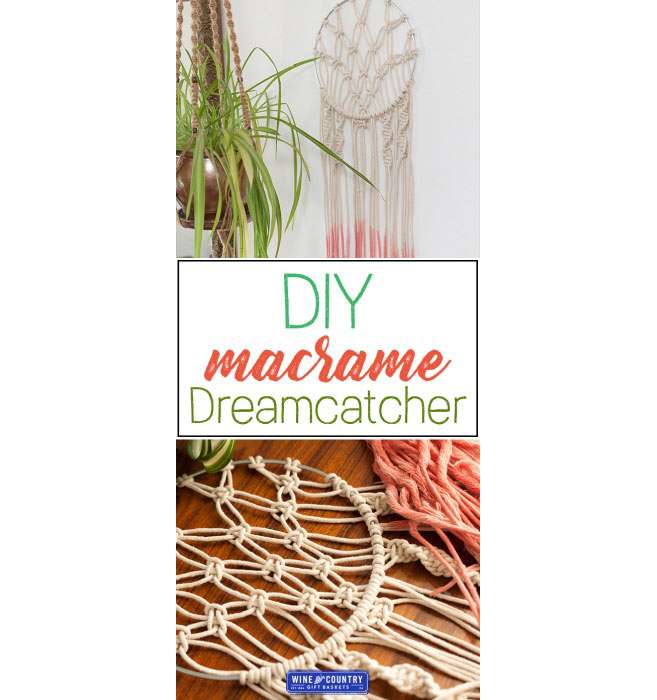
DIY Modern Macramé Dreamcatcher
Macramé décor soared to popularity in the 1970's, adding a soft bohemian touch to wall hangings, plant hangers, and even clothing. This handcrafted technique requiring design through various knots has recently made a resurgence among modern home décor. It can be seen all over social media and home goods stores, bringing about a nostalgic feeling among those of us that grew up with the movement. We found a way to modernize the trend to add a bit of flair to your home, and it couldn't be easier to create! Enjoy this simple modern macramé dreamcatcher DIY.
Supplies:
Cotton Macramé Cord
10" Aluminum Ring
Measuring Tape
Scissors
Fabric Dye (optional)
Rat Tail Comb (optional for fraying ends)
Directions:
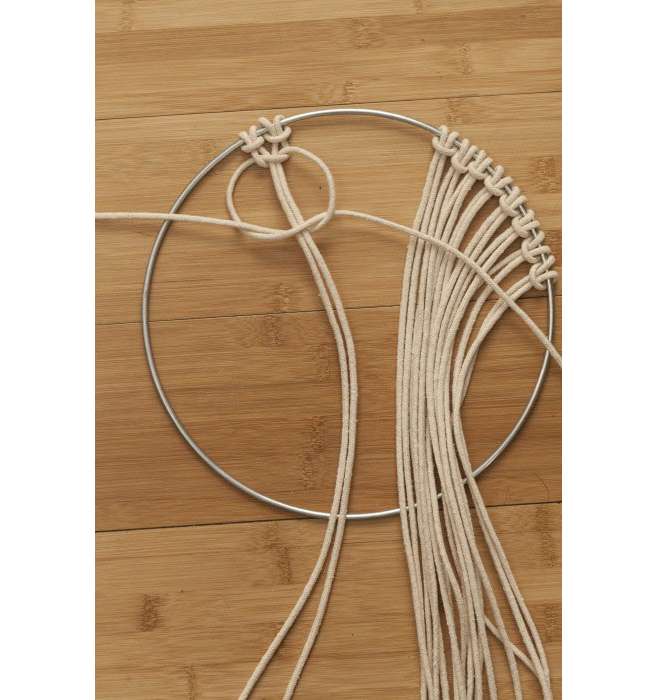
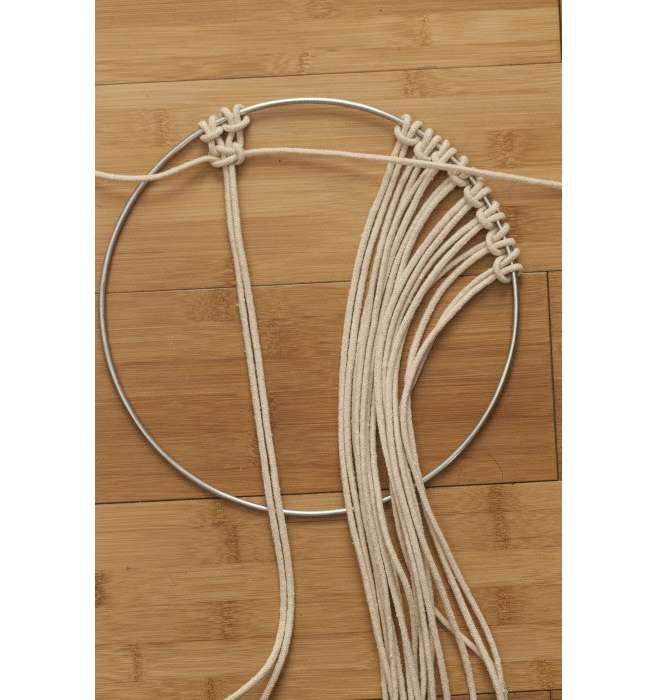
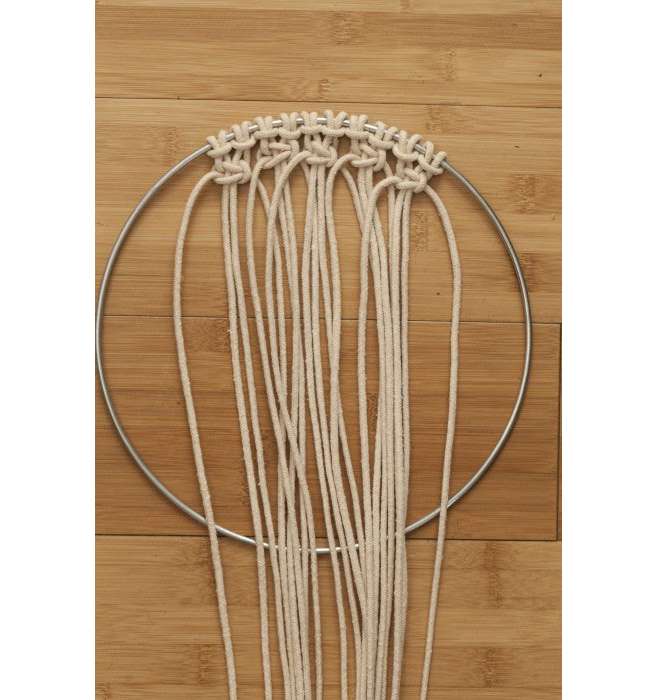
Measure and cut ten pieces of macramé cord, each to 8' long. Tie each piece of the cord to the top of the aluminum ring using a larks head knot (shown below).
Larks head knot instructions: Fold the cord in half, and place the folded portion underneath the ring. Then, bring the two ends of the folded cord over the ring and through the looped portion, then pull to tighten. Repeat this knot with all ten pieces of macramé cord you previously cut.
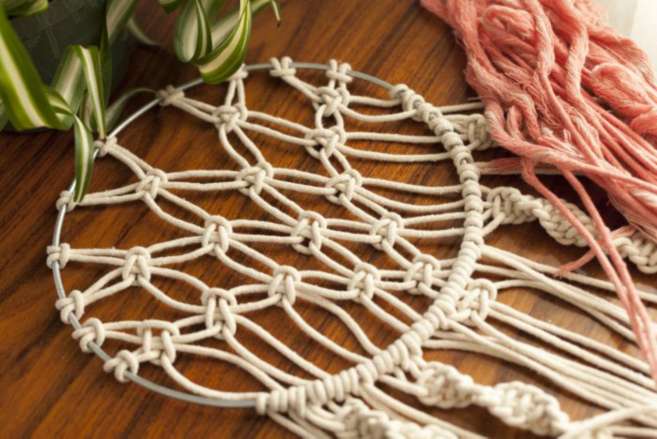
Next, we will tie a series of square knots throughout the middle of the ring to create our fun dreamcatcher design. Square knots use a group of four cords; two center cords (core cords) and two outer cords (which do all of the tying).
Start with the four cords on the very left. Make a "4" shape using the far-left cord, bringing it under the two center core cords and over the far right cord.
Bring the far-right cord over the two center core cords and through the "4" loop. Pull both cords to tighten.
To complete the square knot, we now make a "P" shape using the new far-right cord by bringing it under the two center core cords and over the far-left cord.

Bring the far-left cord up and over the two center core cords and through the "P" loop. Pull to tighten. You are essentially creating the same knot on both sides to complete a square knot.
Repeat the square knot using each group of four cords all of the way across. Your design should start to take shape!
To create the triangle design, you’ll begin to decrease the number of square knots in each row. So, for the second row, you will leave the two far left cords out of the grouping and continue with the next group of four cords.
Continue leaving two cords out on each side per row until you have created this awesome triangle pattern.
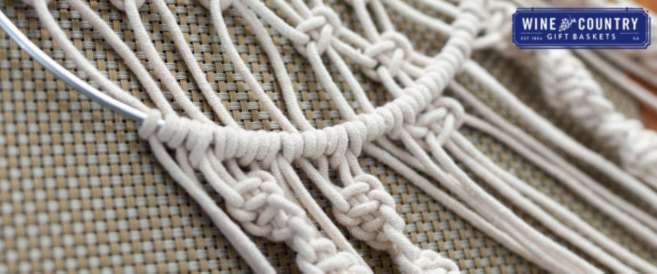
Now we will attach each cord to the bottom of the ring. To do this, simply tie each cord in a double half-hitch knot.
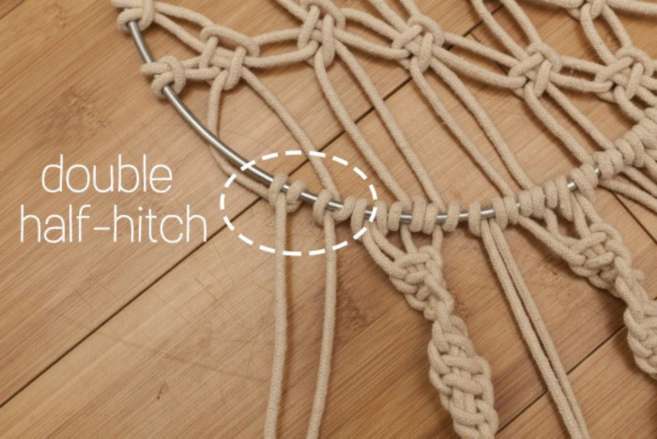
Double half-hitch knot instructions: Start by moving all of the cords to the back side of the ring and tie the knots directly onto the ring. Wrap each cord around the ring, then under the ring creating a loop. Then bring the end of the cord over the ring again, and this time through the loop attaching the cord directly to the ring.
You can finish your dreamcatcher as-is and cut the ends into an interesting design, move the knots in the center to a location you like (we did), or fray the ends to create a whimsical wall hanging. Or, you can continue on to make a more intricate design incorporating one more variety of knots to the bottom of the ring as we did in our design.
If you’d like to continue on, measure and cut seven cords at 4'6" long. Attach each cord to the bottom of the ring using the larks head knot that we used at the beginning of the DIY. We placed each cord in between every two top cord knots. Leaving the two far-right cords to the side, we began to tie half square knots using a group of four cords.
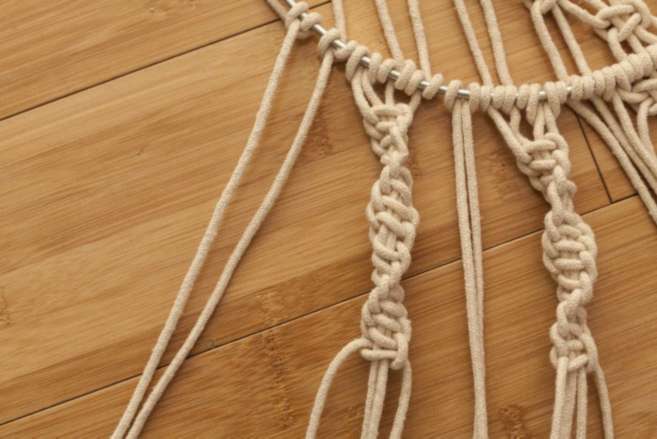
This knot is almost exactly the same as the square knot, but instead of completing the "P" shape, you continue tying "4" shapes instead. This creates the unique twisting looking design to your cords. You can make these as long or short as you'd like. We used around fifteen half square knots in our design. We completed our dreamcatcher using four of these half square knots on the bottom of the ring. You can space them out as you wish. We completed our bottom design by tying one last square knot to the four cords in the very middle of the bottom ring.
Be creative, and try using different knots to create new designs to the bottom. We'd love to see what you come up with by sharing your photos with us on our social channels!
An optional finish to your macramé dreamcatcher includes dying the fabric and fraying the ends. We chose to do both to give this design a modern and eclectic look.
First, we used a coral fabric dye (found at any local craft store) and dip-dyed the ends of our cords. Follow the directions on your fabric dye bottle for best results. Hang dry, then begin to fray the ends of the cords using a rat tail comb. Fair warning: this can be time-consuming, so prepare to be fraying during your favorite Netflix binge.
Voila! Your new Modern Macramé Dreamcatcher is complete and ready for hanging above your bed, or in your living room to complement your décor. We hope you enjoyed this DIY, and if you have any questions, please let us know via our social channels below.
Happy knotting!