How To DIY a Quality, Personalized Gift Basket
When it comes to assembling the perfect gift basket for someone you love – one that’s completely tailored to their likes, their loves, and their favorites – it can be daunting. Not only that, but the task at hand can sometimes be so overwhelming, you’re not even sure where you should start.
Believe it or not, we’d love to help! Take a few expert tips and tricks from the gift basket gurus here at Wine Country Gift Baskets and read on for the best DIY guide to assembling the ultimate custom gift basket for your loved one.
You have to start somewhere.
Picking a general theme for your gift basket is step one. Would they enjoy a personal care basket, that includes spa essentials (women) or grooming supplies (men)? Are they outdoorsy, and should you theme your gift basket around an outdoor adventure? Are they coffee and tea-loving bookworms? Narrow down an interest or two that you know your recipient has, and customize your gift basket around that. Revisit our blog on Wednesday, when we'll be releasing over 20 different custom gift basket ideas, complete with item lists and photos!
Make a list.
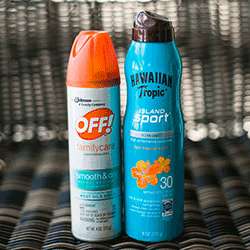
Once you’ve picked a category, make a list of every item you can think of in that category that would fit in a basket. This is important: write it down. If we were to pick a camping basket theme, we would write down an extensive list of camping-themed items, such as: a lantern or flashlight, bug spray, sunscreen, a cooler, a beach towel, a portable game or deck of cards, a tent, a sleeping bag, snacks, a water bottle, and a new sweatshirt or hat. Even if the item sounds silly, add it to your list.
Check it twice.
Once you’ve completed your item list, review it carefully and remove items that would be too big to put in a basket. Or, alternatively, check your list for items that could easily serve as the basket. In our camping gift basket example above, we would either cross off the tent, sleeping bag, and cooler for their size restrictions, or, we would simply use the cooler as the basket. If we were to purchase a cooler large enough, we would even be able to fit the tent and sleeping bag inside!
Pro tip: Recycle an old basket, or an item that can serve as a basket, to save money. Wine Country Gift Baskets provides gorgeous baskets in all of their gifts, so if you've ever received one, reuse that!
If you have budget restrictions, you can also remove all of the items that will quickly send you over-budget or leave less to spend on additional items. For example, we might remove the tent and the sleeping bag, and purchase a medium to small cooler to place the rest of the items in. Keep in mind, few things look stranger than a half-empty gift basket, wrapped and presented. You want your basket to look stuffed to overflowing!
The fun part - go shopping, but don’t bust your budget!

Now’s the time to purchase all the items left on your list. If you're building a basket on a budget, though, track your spending as high-quality, customized gift baskets can get quite costly if you don’t watch your P’s and Q’s. Also, if possible, purchase items in a similar color scheme (e.g. hues of green) or coordinating colors (e.g. reds and blacks) to add aesthetic appeal to your basket (that's what we do!). We recommend purchasing your actual gift basket (or cooler, in our example) last, that way you can size up all of your items and purchase the appropriately-sized basket to fit them all in. Or, if you're recycling an old basket or bin, be mindful of its size while shopping. Remember, it’s always better to go a little smaller in basket size and wrap an item or two separately to present to your recipient than to offer them an empty-looking basket.
While you’re out and about, be sure to purchase some cellophane shrink wrap (found at your local craft store), coordinating ribbon in a size and color that would look pleasing wrapped around your gift basket, and tissue paper or sizzle (shredded, crumpled paper). If you don’t have cardboard at home, pick some up while you’re out. Popsicle sticks and a hot glue gun will also come in handy! You’ll need all of these items for the next step.
Prep it and stuff it.
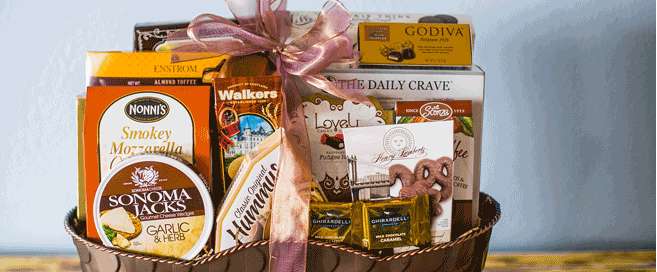
Here’s the challenging part – getting everything to fit inside of your gift basket! Here at Wine Country Gift Baskets, we place a cardboard riser inside of each basket to prop all of the items up with, that way they display beautifully. Depending on the shape of the basket, we may create different tiers or levels to the cardboard, that way some of our items sit taller at the back and others sit shorter at the front. We also use a cardboard ‘back rest’ at the very back of our baskets, so that all of the items will have a good, strong support behind them.
Determine if your gift basket would benefit from a cardboard insert, and create one using the cardboard you picked up if it does. Pro tip: make sure the cardboard sits 1"-2" below the rim of your basket.
Next, add the sizzle on top of the cardboard, that way you hide it and make a beautiful "nest" for your items. Depending on the size of the gifts you purchase, you may need to cut into the cardboard to accommodate them. For example, when we place a bottle of wine into one of our gift baskets, we cut a round hole in the cardboard so that the bottle sinks a little deeper than the rest of the items. This makes our basket look balanced, since wine bottles are generally taller than most cracker or cookie boxes.
Pro tip: Make sure you remove the price tags on all of the gifts, before you stuff your basket!
Once you’re finished removing price tags, start placing your taller/larger pieces and add the smaller ones all around them. Hot gluing the smaller things to a popsicle stick and poking the stick through the cardboard is also a great way to keep difficult items standing tall and presentable. Just make sure you can’t see the popsicle sticks as you stuff your basket, and that the hot glue doesn't damage the item you're gifting.
Wrap it up!
Once you’re happy with how your gift basket looks, unroll the cellophane onto the ground or a large table and place your personalized gift basket in the center. Be sure you unroll enough so that, when you bring all sides of cellophane up and over the top of the gift basket, there is 6"-12" of extra cellophane above your hand. The more cellophane you have left over, the easier it will be to tie a ribbon around it. If your gift basket is wider than the cellophane roll, simply cut the cellophane at a good length, roll a second piece out to match it in length and cut it, taping the two pieces of cellophane together only where the bottom of the gift basket will sit. By doing this, you should have doubled the width and kept the tape hidden at the same time.
Take your ribbon and cut a very long piece. With your cellophane cut and taped, pull all sides of the cellophane up and over the gift basket, and tie it off with the ribbon. There are plenty of YouTube tutorials on how to tie a beautiful bow, and we encourage you to look into them, that way your basket has a professional touch. At this point, you have the option of using a hair dryer and ‘shrink-wrapping’ your gift basket according to the cellophane’s directions. This additional step will help keep all of your items in place during transit, and offers an additional layer of security. Again, that's what we do here at Wine Country Gift Baskets to ensure our gift baskets arrive at their destination in perfect condition.
Present it.
Now that your gift basket is gorgeously assembled and wrapped, it’s time to give it to the recipient! They will no doubt be excited to receive such a personalized, thoughtful gift. Don't forget to include the gift card!
DIYing the perfect customized gift basket is a task not for the faint of heart, as it requires lots of planning, shopping, and some tricky assembling. Of course, to avoid the great lengths it takes to assemble your own, you can always purchase one of the already-assembled, elegant gift baskets that we have already hand-crafted with tender, loving care. With hundreds of options to choose from, from non-wine gift baskets to wine-specific gift baskets (and everything in between), you’re bound to find a gift basket that perfectly suits your recipient. A good number of our gift baskets even include free shipping, too! If you need help choosing, chat with one of Wine Country Gift Basket’s Consultants and we can help pick out the ideal gift basket for your loved one.
Visit our website now to start the search for your perfect gift basket, and stay tuned for our blog posts on detailing 20 different gift basket themes!